Product configuration
This guide covers creating and configuring products in the Compliance Studio for age verification.
Product test and live modes
Each product in the Compliance Studio has two distinct modes:
- Test Mode: For development and testing
- Live Mode: For production use
Key differences
| Aspect | Test Mode | Live Mode |
|---|---|---|
| API Hostname | test.prod.ageapi.org | prod.ageapi.org |
| Product Configuration | Separate test settings | Separate live settings |
| API Keys | Test-specific keys | Live-specific keys |
| Webhooks | Test webhook endpoints | Live webhook endpoints |
| Usage | Development and testing | Production traffic |
Important - Start with test mode for development. You only need to create a live mode product when you're ready to launch to production. In test mode you can use provider test credentials (for example, test cards and test IDs) to simulate outcomes; it can't produce real, verified results for real users. For details, see Testing and development considerations.
Creating a new product
-
In the dashboard, click "New Product"
- Navigate to the main dashboard
- Look for the "New Product" button
-
Choose creation method
- A dialog is displayed asking to create a new product or use an existing one as a template
- Select your preferred option
-
Click "Create" in the dialog
- Confirm your selection to proceed
-
Product is created
- If not using a template, the product name is set to "Untitled"
- You can rename it later in the product settings
-
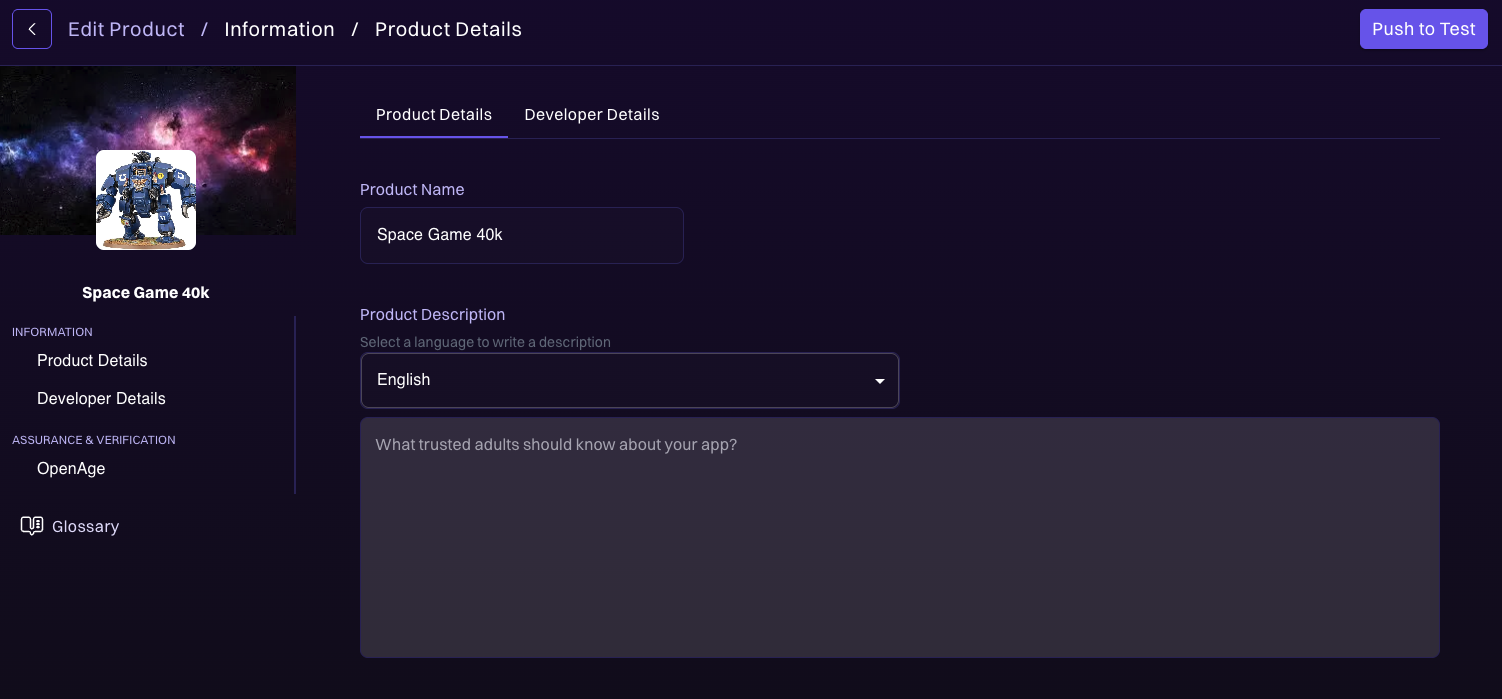
Set product details and push to test
- Set the product name and description
- Click "Push to Test" in the top right corner to activate the product
Configuring your product
Basic settings
After creating your product, you can configure:
- Product name and description
- Verification methods (age estimation, ID document)
- Age thresholds for different categories
- Jurisdiction settings for compliance
Customizing verification methods
To configure age assurance and verification methods:
-
Select product from dashboard
- Choose your product from the main dashboard
-
Click "Assurance & Verification"
- Navigate to the assurance and verification section
-
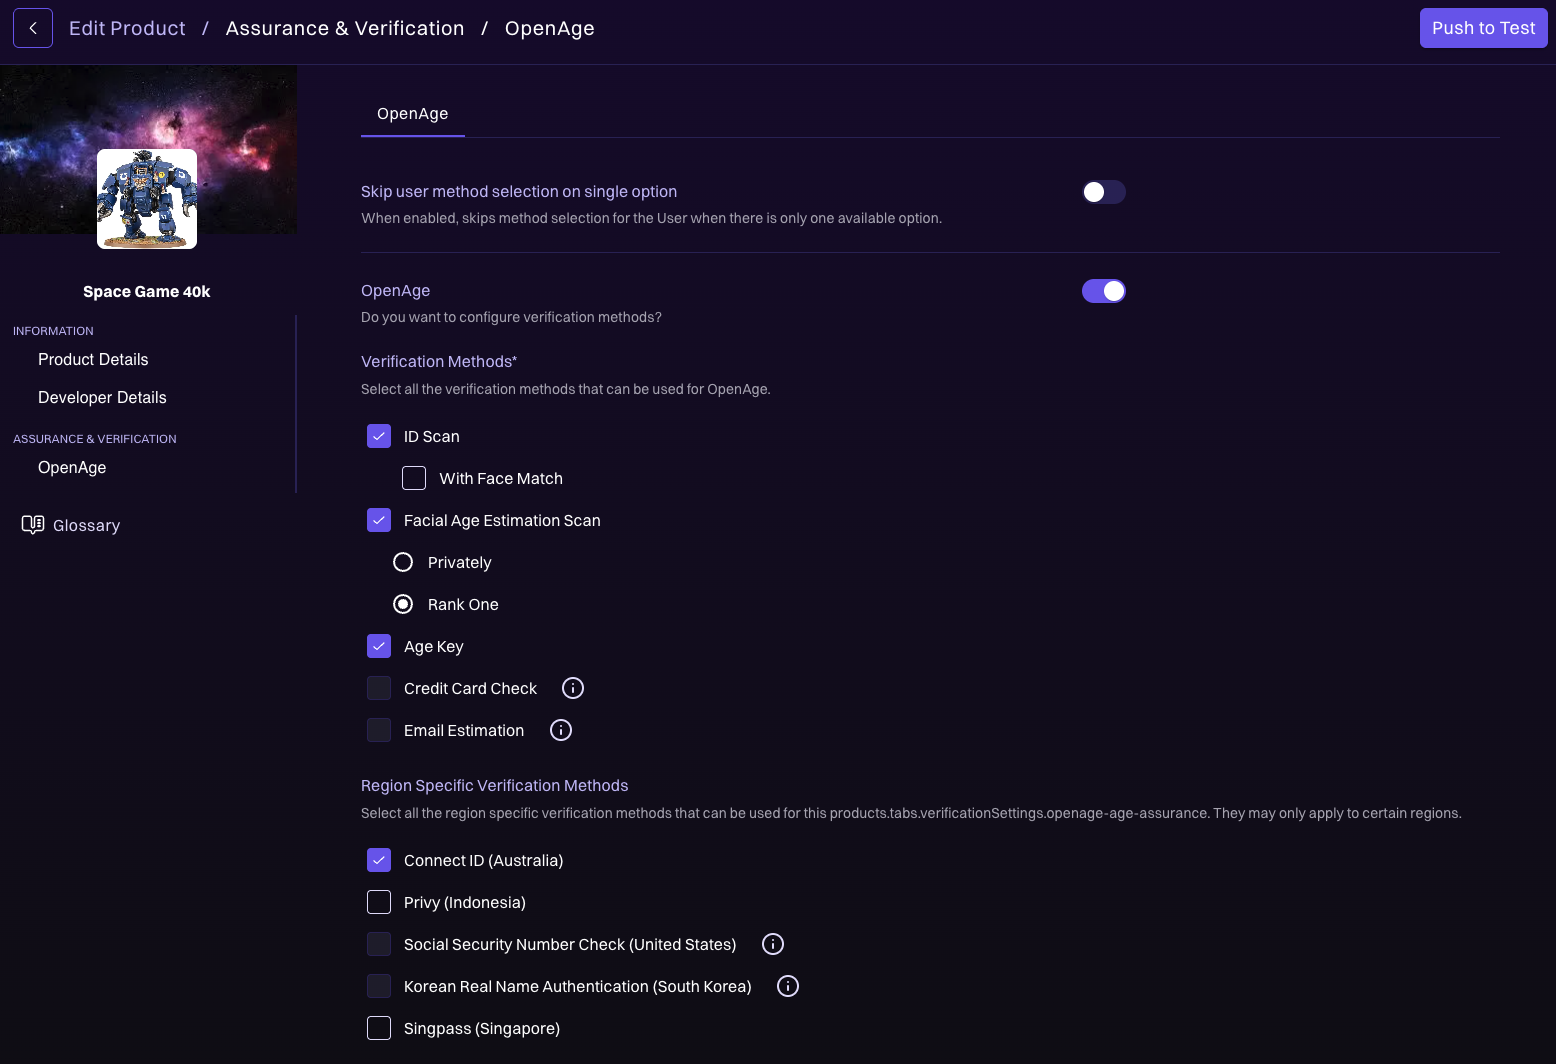
Click the edit button on the right side of "OpenAge"
- This opens the OpenAge configuration options
OpenAge settings
You can customize the following settings:
Skip user method selection on single option (toggle)
- When enabled, skips method selection for the user when there is only one available option
OpenAge (toggle)
- Do you want to configure verification methods?
- After enabling, users can select verification methods used globally, or they can set verification methods that are jurisdiction specific
Available verification methods
Configure which verification methods are available for your product, including region specific verification methods. For detailed information about each verification method, see the Verification Methods Guide.
By default, a product has AgeKey, ID scan verification, and facial age estimation scan enabled. For users in Australia, ConnectID is also enabled by default. Other verification methods can incur additional costs. To enable additional methods, contact your OpenAge representative.
Enabling, disabling, and Fallback only
Under the Assurance and Verification tab, each verification method your product lists there can be set to one of three states:
Enabled: The method can be shown to users according to the usual rules (for example, based on jurisdiction).Disabled: The method is never shown.Fallback only: The method is shown only after the user has attempted another verification method and that attempt didn't produce an age signal (it ended without determining whether the user meets your age criteria). Use this when you want a backup method available only when a prior attempt failed to reach a conclusive verification outcome.
These states apply per-method and are respected by both global and jurisdiction-specific verification lists.
Ordering verification methods
You can control the order in which verification methods are presented to end users for a given jurisdiction (or globally). Under the Assurance and Verification tab, each Enabled method has a drag handle at the left of each row that you can use to change its position in the list. Disabled methods can't be dragged. Fallback only methods are ordered among themselves and are only considered after a non-fallback attempt fails to produce an age signal.
To change the order:
- Open the Assurance and Verification tab for your product.
- Select the scope you want to reorder (global, or a specific jurisdiction).
- Drag an Enabled method to its new position. A shadow row indicates the drop target.
- Release to drop. The new order is saved automatically.
- To go back to the system default, click Reset to default order preceding the list.
Order precedence for end users
When the OpenAge verification widget picks which methods to offer, it resolves order in this priority:
- Exact jurisdiction configuration (for example,
US-CA). - Parent jurisdiction configuration (for example,
US). - Global product configuration.
- OpenAge default order.
The same precedence applies to which methods are Enabled, Disabled, or Fallback only.
Next steps
- API Keys: Generate API keys for your product
- Webhooks: Set up webhook endpoints
- Age verification guide: Implement age verification